


We are always saying that our epoxy resin and hardener are super easy to use and beginners can use them and create amazing results from the start - Which they absolutely can!
But...
Depending on lots of different factors such as your previous crafting experience, your ability to follow instructions and different environmental factors that you might not have considered, things can go wrong when using crystal clear epoxy resin in your projects.
That's why practice makes perfect and you might need to brace yourself for not being great at the start, but instead - be willing to keep going, experiment and learn as you go along to be able to create the most amazing resin projects!
We know that not being perfect with anything at the start does really suck, and you might have seen other creations that are just the most beautiful looking epoxy resin projects and be thinking but why can't I create like they have!?
You can't compare your journey to anyone else's in the resin world, take a step back and look at it objectively - They might have started creating years ago! Maybe their first projects were worse than yours in the beginning!

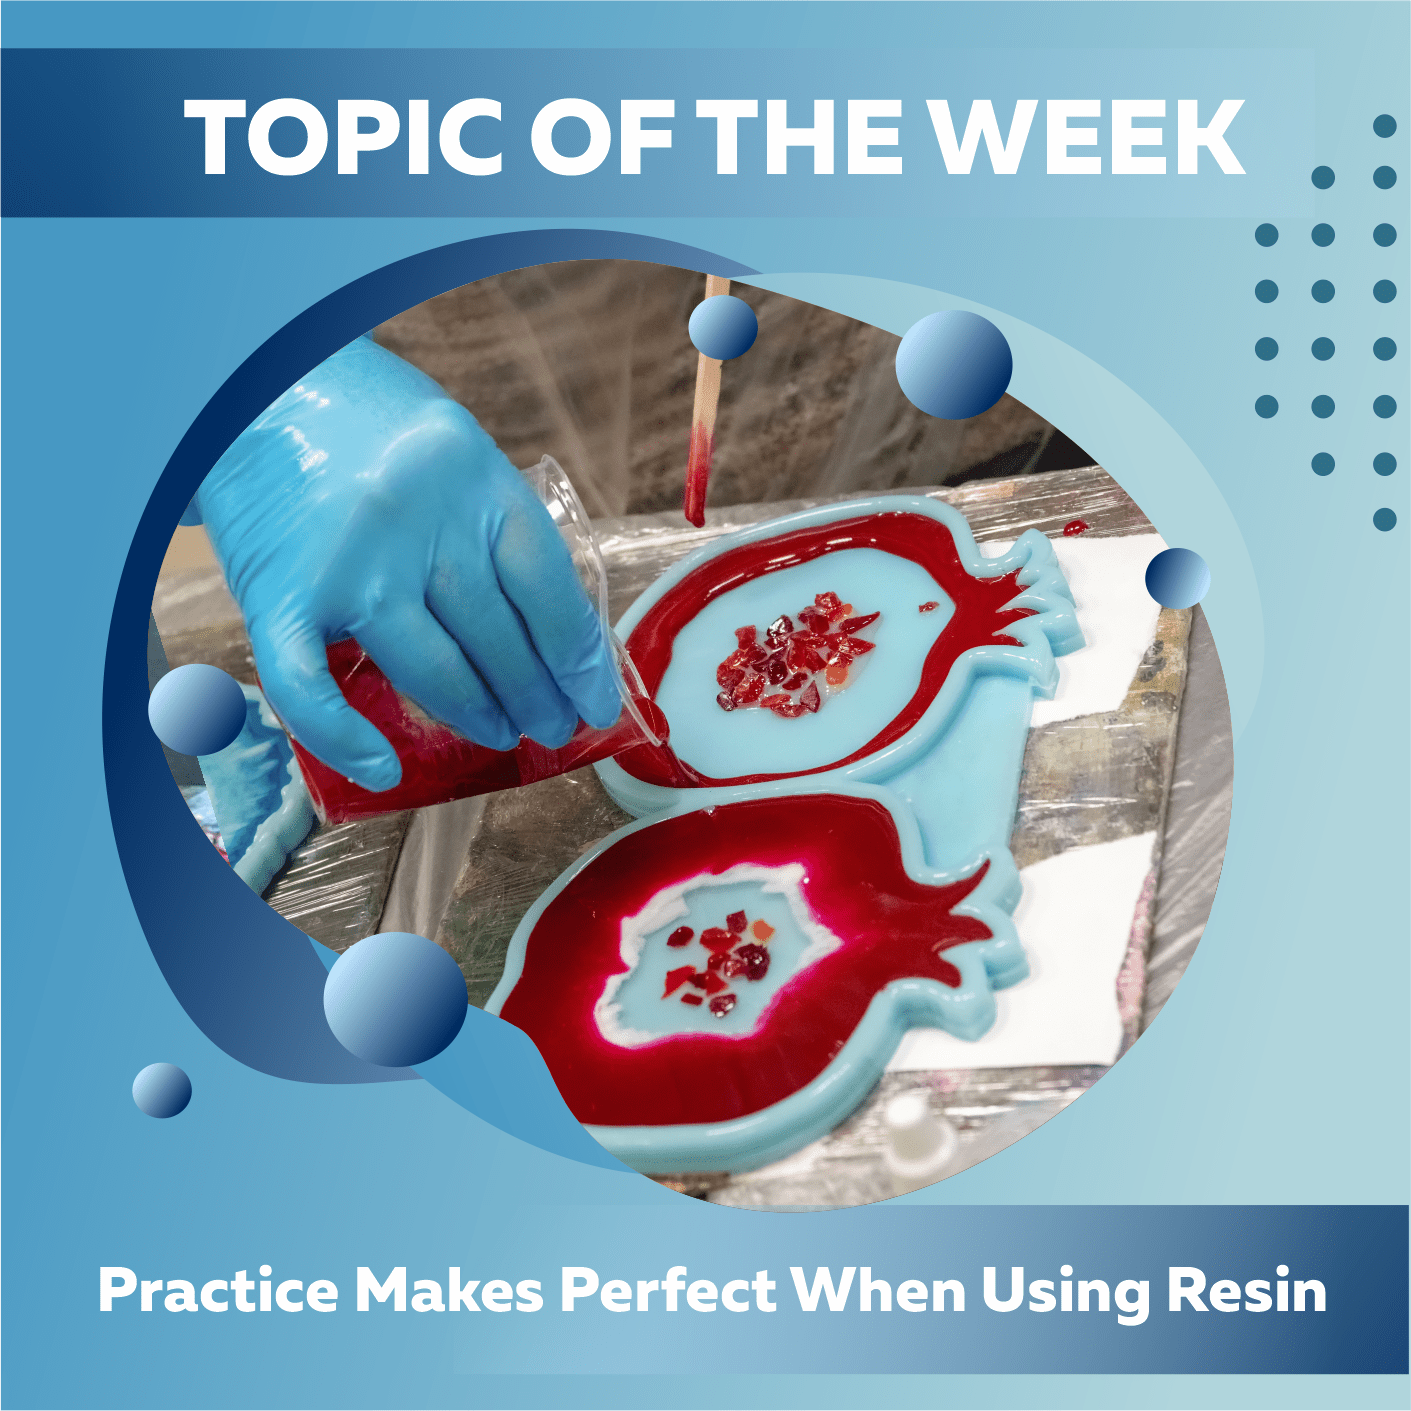
Because this can be very frustrating, we want to go over some of the most common mistakes that people make when they start creating with our resin so that you know what to look out for and how to avoid some of them - hopefully this will shorten your practice timescale.
Preparation:
You do need to prepare before you start creating. You need to prepare all your kit to be close by, you need to prepare your work area and cover it in case of any spillages, you need to prepare the temperature (we’ll move onto temperature in a moment).
The working time of Craft Resin is about 40-50 minutes (depending on various factors). You need to have everything close by because this doesn’t give you a lot of time to use your resin mix, you don’t want to be rushing around panicking trying to locate a mold or a cloth when your resin mix is sat there as this time will quickly disappear.
Make sure that your working area is protected and as clean as it can be. Protect things like carpets, table surfaces etc, resin is very runny and can get everywhere, it is very hard/impossible to get it out of carpets. Dirt/dust/pet hair/bugs can be attracted to resin, try to make sure these can’t get into your work, once they are in and your work has cured you can’t get rid of them easily.
Make sure you are also protected, tie long hair back, wear gloves and have a spare pair nearby in case they break, wear a plastic apron and look into wearing a face mask/respirator depending on how well ventilated the area you are working in is.
You can find out what kit you will need in our Equipment Blog.

Temperature:
Temperature can play a huge role in how well your project turns out, but it’s often a factor that many people skip when preparing their working area. If your work area is too cold issues will occur in your resin projects and they might take longer, or not cure at all.
Make sure the temperature in your workspace is between 21-24C 70-75F and this is kept between these during the first 24 hours of the curing process too.
Humidity can also play a factor in issues occurring, so if you think you could have any humidity issues in your workspace we would recommend getting a humidity gage and monitoring this. You ideally want the humidity under 75% which should be ok, if you can get it lower still, then great, sometimes a dehumidifier can help.

Measuring:
The biggest mistake we see people making at Craft Resin is in the measuring stage. The issue is that every brands resin is formulated differently and therefore needs different amounts of resin and hardener to make the formula work.
With our brand you need to measure in equal volume, so if you have 50ml of resin, you also need 50ml of hardener. When equal amounts in volume are mixed together the balance will be perfect for the chemical reaction (exothermic reaction) to start and for the resin to cure/harden.
Mixing:
Once you’ve measured perfectly, you’ll then need to mix the resin and hardener together. Simply pour them together and then mix in a slow controlled way. Mixing slowly will help less bubbles to appear and you’ll also be able to make sure that you’re mixing thoroughly, scraping the sides and bottom as you go ensure all the mixture is being mixed.
You need to ensure you mix for a minimum of 5 minutes, so make sure you set a timer and try not to go below this. You can go over this mark, some people mix for between 5-7 minutes, how long you’ll need to mix for will take some experimenting, you’ll find your sweet spot with this as you create more and more projects.

Pouring:
When pouring the resin mix, another mistake people can make is that they scrape the sides and bottom of the mixing jugs to get every last drop out. The issue with doing this is that some unmixed resin can still get into your finished pour, which if it does can create areas that won’t cure in your work. It really is best to leave scraping the sides and bottom as you pour.
Curing:
This stage should be the simplest, you leave your resin alone to cure/harden - But the moth to a flame temptation to touch, move, or fiddle with your curing resin projects is very strong!
Please we beg you all, try not to touch your work during the curing stage as issues can occur and you could ruin all the hard work you’ve already put into you resin creation.
As the title to this blog suggests, practice really does make perfect when using epoxy resin.
The more you practice with resin, techniques and different projects, the more mistakes you will probably make along the way, but the quicker you will learn and you’ll find your way to create your own perfect resin projects.
The only way to get better with resin is to get stuck in and give it a go, and then repeat.
And lastly, just like any artwork out in the world, just because you may not look at it and think it’s the most perfect project ever, doesn’t mean someone else won’t see its beauty. It’s all about who's eyes are looking at your work and how they view it.
Artists can be so self critical, which can be a nice trait to have, because it means they care about their creations, but you will always be the harshest critic out there. Others won't notice a little imperfection here and there as much as you will.

If you haven't started creating with resin yet, but the points above have put your mind at ease that you could get started using the correct techniques then why not buy an epoxy resin starter kit today and get practicing!
Topic Of The Week Giveaway:
We have attached a giveaway to these Topic Of The Week announcements on our Instagram platform, this is helping us to spread the knowledge of how to use epoxy resin further, but also enabling anyone who helps us share this information to win free resin and mica powders.

To enter the weekly giveaway please see the latest post #CRWEEK8 on our Instagram feed/highlights and follow the instructions to enter:
Team Craft Resin

