


The summer is upon us and it feels like everyone we see on social media is on holiday or at least, on a beach! All of this beach scenery is making us want to share how to create your own epoxy resin beach art.
Who said you need to leave your holiday/beach trip behind, why not encapsulate it in epoxy resin and bring it with you to create a memory that lasts throughout time.
First of all you’ll need to think about the type of project you’d like to create, will you be creating a special beach coaster or set of? How about a beach artwork? Or a beach table top?

Depending what you would like to create will depend what the base needs to be created on and how this will need to be prepped before applying the beach scene and also adding the epoxy resin. Please do your own research before hand on the specific project that you would like to create but we’ll be talking today about a general beach project that we would create in a mold as a base.
The next thing to think about is what beach items you have access to and which ones you may need to make out of resin before hand, for example you can collect shells when you’re at the beach or you can create your own resin shells to place in your project. Can you collect sand from your next beach visit, or do you need to buy some from your local hardware store. Gather beach items as you go through the year, as you head away on holiday find items you can bring back with you.

Once you have these items you can then think about how you would like your beach art to look. When thinking about this please note that you will be building these up in layers, so the bottom section closet to your mold/base you’ll want to place the sand possibly, then you’ll add in some shells, then you’ll pour the epoxy resin on to create the ocean part. You can draw your beach scene out to plan it first if you’d like to, or simply place it all as you go and have fun watching how it turns out. As epoxy resin is fluid, items can move throughout, so although you can plan an idea, it might not look exactly the same once it’s done.
To then create the art, simply measure, and mix your Craft Resin epoxy resin, keep this clear and add in your sand after you’ve mixed it for around 5 minutes. Check out our YouTube channel for how to measure, mix and pour the resin.
How much sand you’ll want to add at this point depends, have a play and experiment with how much sand to use each time. Then simply pour this into your mold/onto your base and let it stand for a few minutes. Craft Resin takes about 40 minutes to harden so you can no longer pour it, and so you have a while before you can no longer move it with the measuring stick into the areas that you’d like the sandy layer in.

Once you have poured this you can then use a heat torch to disperse any surface bubbles by sweeping it over the project gently, and you can also remove any blemishes of dirt/dust you can see in the sand with a cocktail stick if there are any. As the sand starts to cure you can add any shells or other items that you would like in your project into your work. If you add these too close to initially pouring the sand in they can sink to the bottom, so add these at the point you need to in order for them to stand out and sit how you want them to.
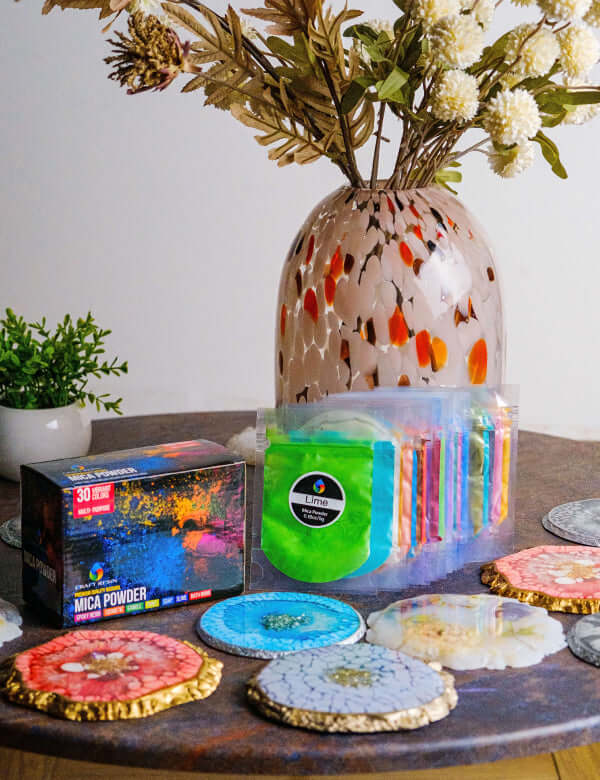
Once the sand any any beach items are in place you can then start mixing a couple of blue colours into two more cups of resin mix, and also a white. You can use Mica Powders to create these colours if you want to.

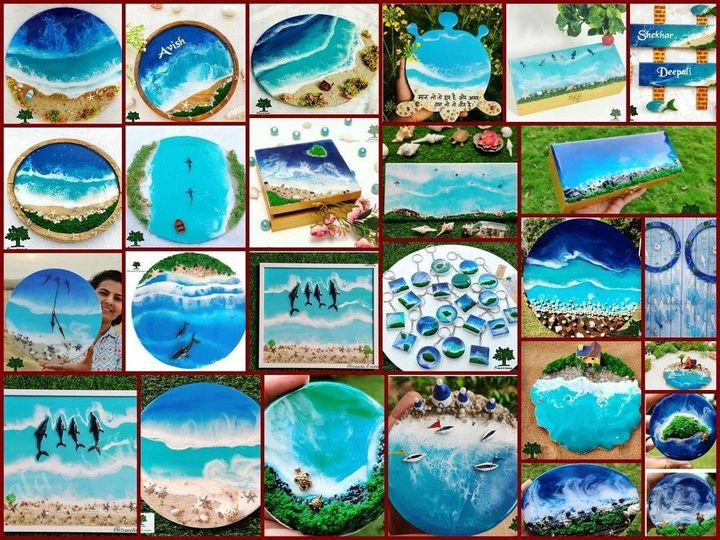
Once you have these mixed you can add them to your creation. It’s best to start off by pouring the darker blue towards the back of your artwork, then pour on a lighter shade on from this, the darker shade will symbolise the deeper ocean and the lighter will symbolise closer to the shore line, then the white will be used for the waves and the breakers.
Remember with epoxy resin a little goes a long way, and you’re not trying to cover the entire sandy area with the resin blues, just enough to add some ocean to the project.
You can mix these together slightly if you’d like to whilst your hands are fully gloved. What you’ll then do is use a heat torch sideways to gently push the lighter blue into the darker blue, creating wave effects. Some experimentation will be needed at this stage to get the movement just right, sometimes it can take practise to get this perfect.

Then you can add on lines of the white resin mix at the starting edge of the lighter blue and once again use a heat torch to gently push this back. This creates the wave breaks and makes your ocean really come alive. Again add less first and then you can always add more as you go. Add too much at the beginning and you won’t be able to take it away.
Once the waves have been created you can add a clear topcoat of resin if you would like to, this will ensure the top level either domes slightly or lays perfectly flat, which is great if you’re creating beach coasters.

You will need to leave these to cure for at least 24 hours, maybe longer depending on thickness and the temperature in your curing environment. Always leave for longer if you are unsure before taking them out of the molds, or moving your artwork.
If you have created beach art in molds, you may want to sand down and shape the edges to your projects and you can even use a coloured pen to add to the edges if you’d like to, or leave as they are for the beach layers to display through at the edges.
There you have it your own little keepsakes from your holiday/beach trip. Or a great addition to your resin business portfolio to sell, imagine the business you can get from being able to encapsulate people’s holidays for them!
Please do try these kinds of projects on your own beach finds before using other peoples precious beach/holiday finds to create and sell. As with all epoxy resin projects sometimes you need to practise the techniques before they turn out perfectly.
Please do tag us in any beach creations you make after learning from this blog, we’d love to see your artistic take on these kinds of projects @craft.resin
Team Craft Resin
